
First edition 4 Nov 2026 · Last updated 7 Nov 2026 — rewritten to match the real game: entry from the farm sign at P11, the tutorial, full controls for keyboard, phone and gamepad, and 13 real screenshots.
This game is still in testing. The server decides every result.
1. Entering the farm
Walk to P11 park in the city. A wooden farm sign stands on the west side of the path. Step close and press the button shown on screen. The game opens full screen on the rooftop farm.
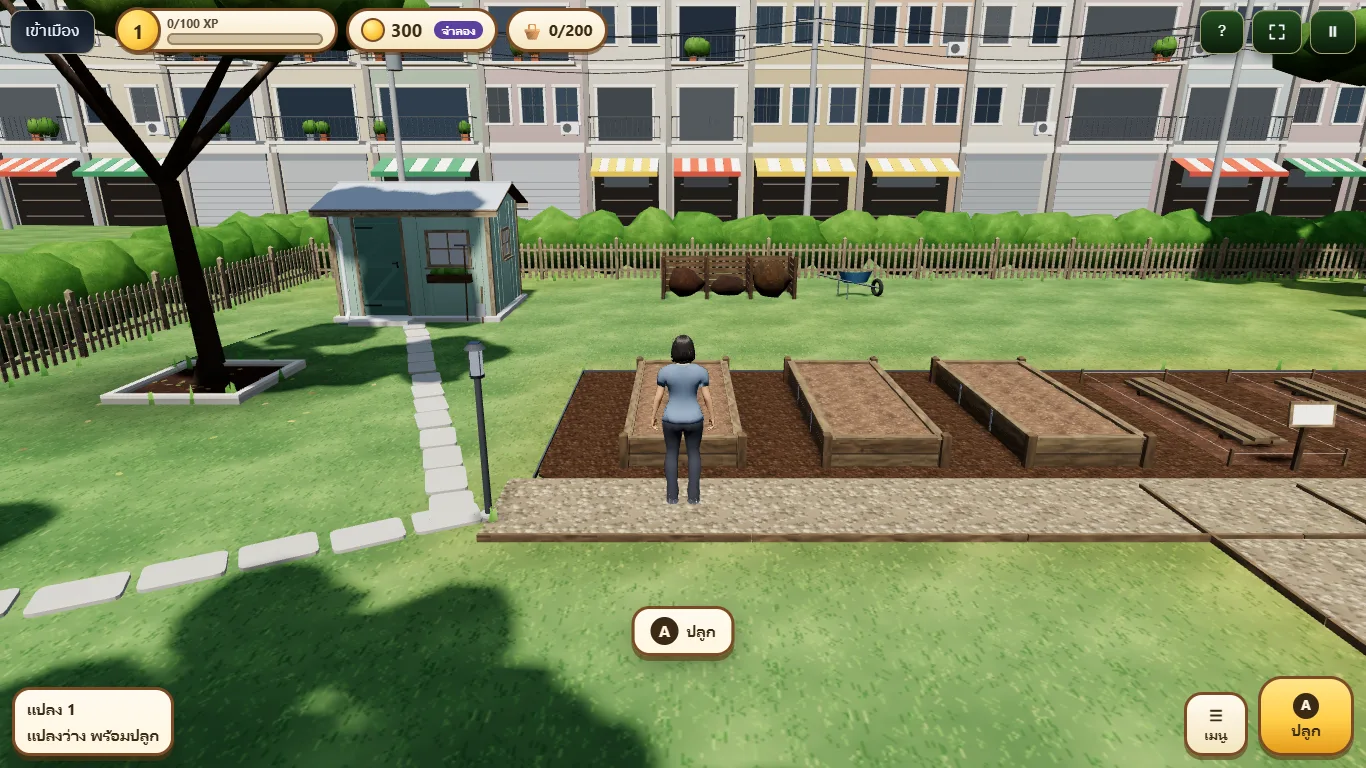
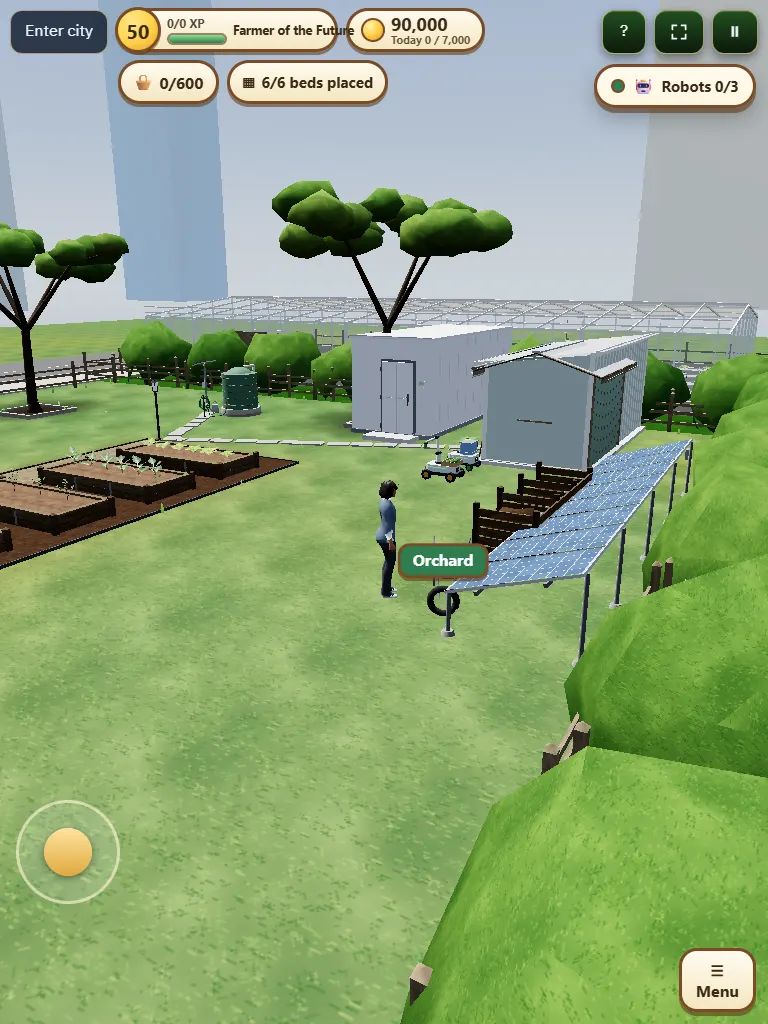
- Top bar: level and XP, your farm money, and the number of items in the crate (up to 200).
- The Back to city button (top left) leaves the farm. The ? button opens this guide. The pause button is top right.
- Walk up to a bed, the sell stand, the order board or the shed and a label tells you what you can press. If you are too far, the game asks you to step closer.
2. Tutorial
The first time you enter, the game walks you through it step by step (you can use Skip).
- Walk to bed 1.
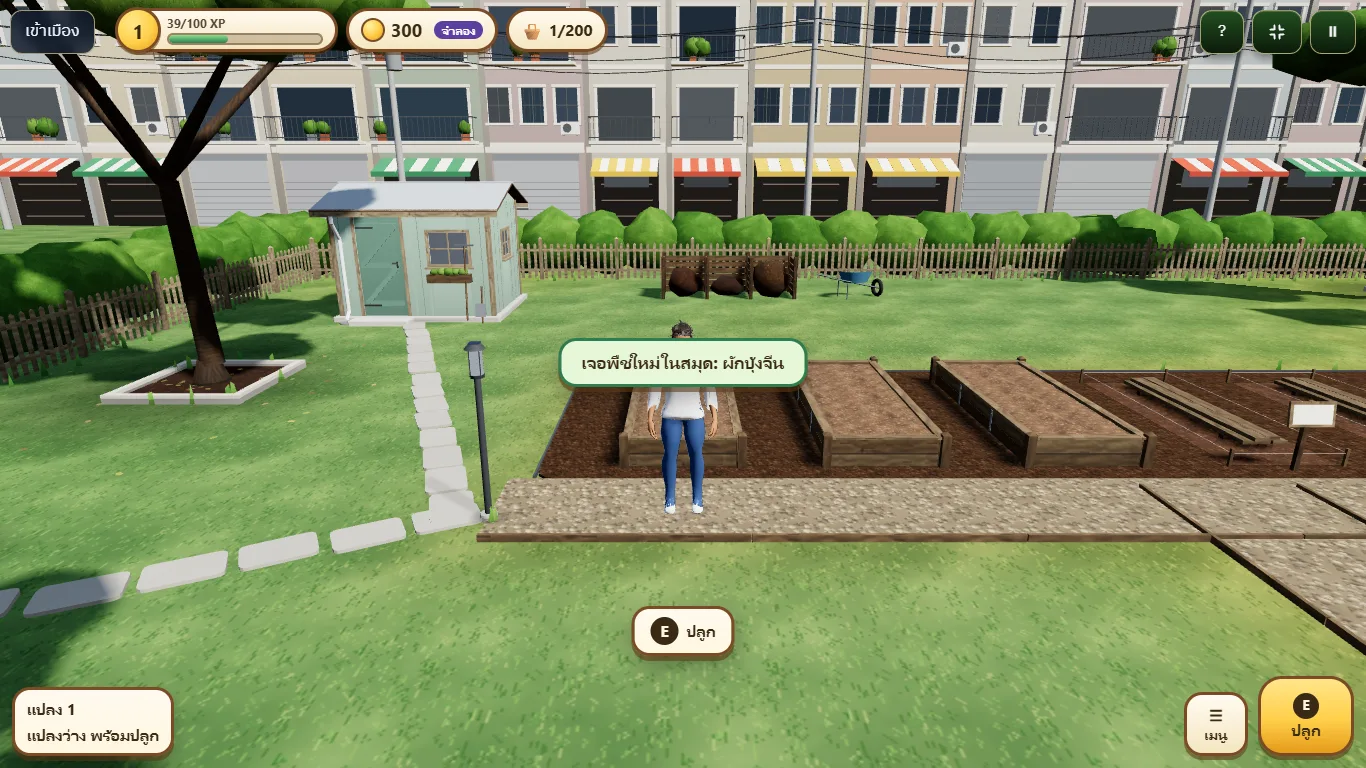
- Press Plant and choose morning glory (3 free seeds).
- Water the seedling.
- Wait for it to grow. Watch the growth bar at the corner of the screen.
- When it is ready, press Harvest.
- Take the produce to the sell stand.
3. Controls
| Action | Keyboard | Phone | Gamepad |
|---|---|---|---|
| Walk | WASD / arrows | On-screen joystick (left) | Left stick |
| Run | Hold Shift | — | — |
| Do what the label says (plant, water, harvest, sell) | E / Space / Enter | A button | A |
| Fertilise | F | X button | X |
| Do all beds (unlocked at level 4) | R | Y button | Y |
| Back / close a window | Esc / Backspace | ✕ button | B |
| Crop almanac | Tab / J | Menu ☰ | Select |
| Daily quests / unlocks (outside a window) | Q / T | Menu ☰ | LB / RB |
| Switch page/tab (inside a window) | Q / T | Previous / next page buttons | LB / RB |
| Pause | Pause button | Pause button | Start |
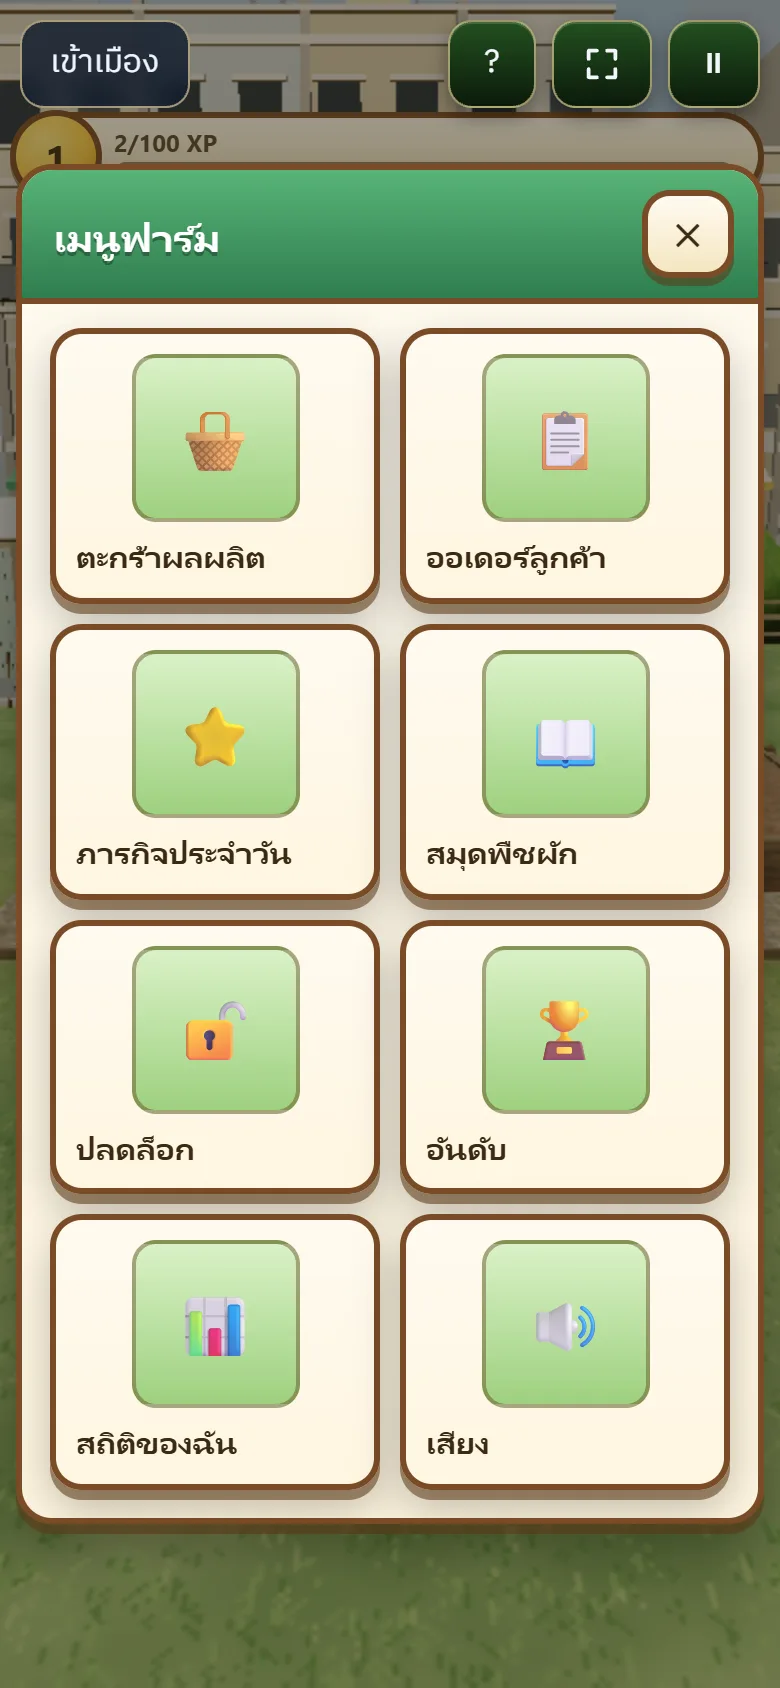
On a phone, the Menu ☰ button opens the farm menu with 9 tiles: produce crate, customer orders, daily quests, crop almanac, unlocks, my zones, leaderboards, my stats and sound. Landscape mode is supported.
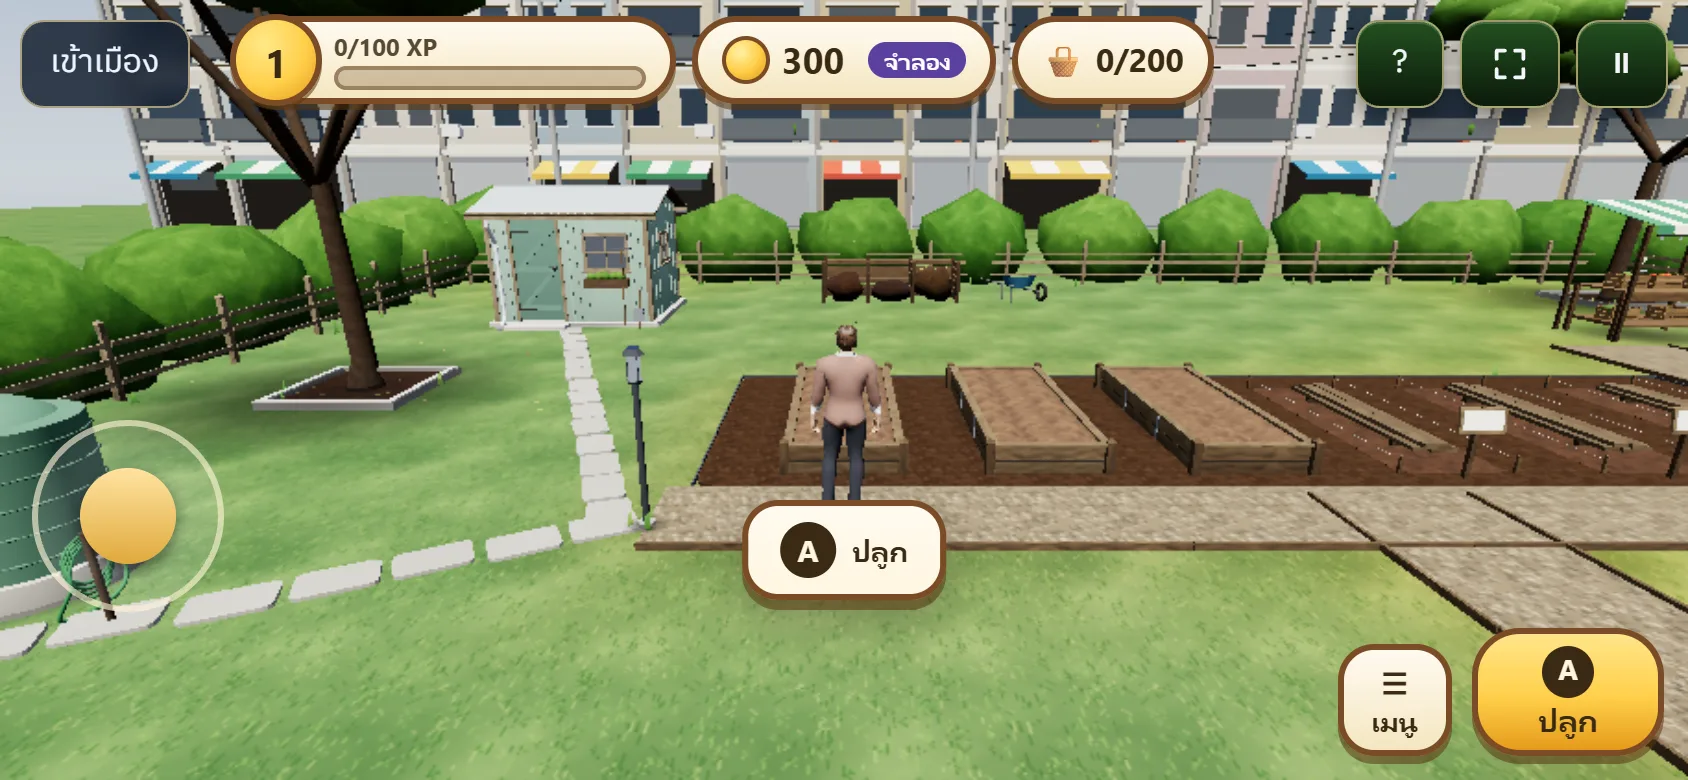
4. The loop: plant, water, wait, harvest, sell
Plant
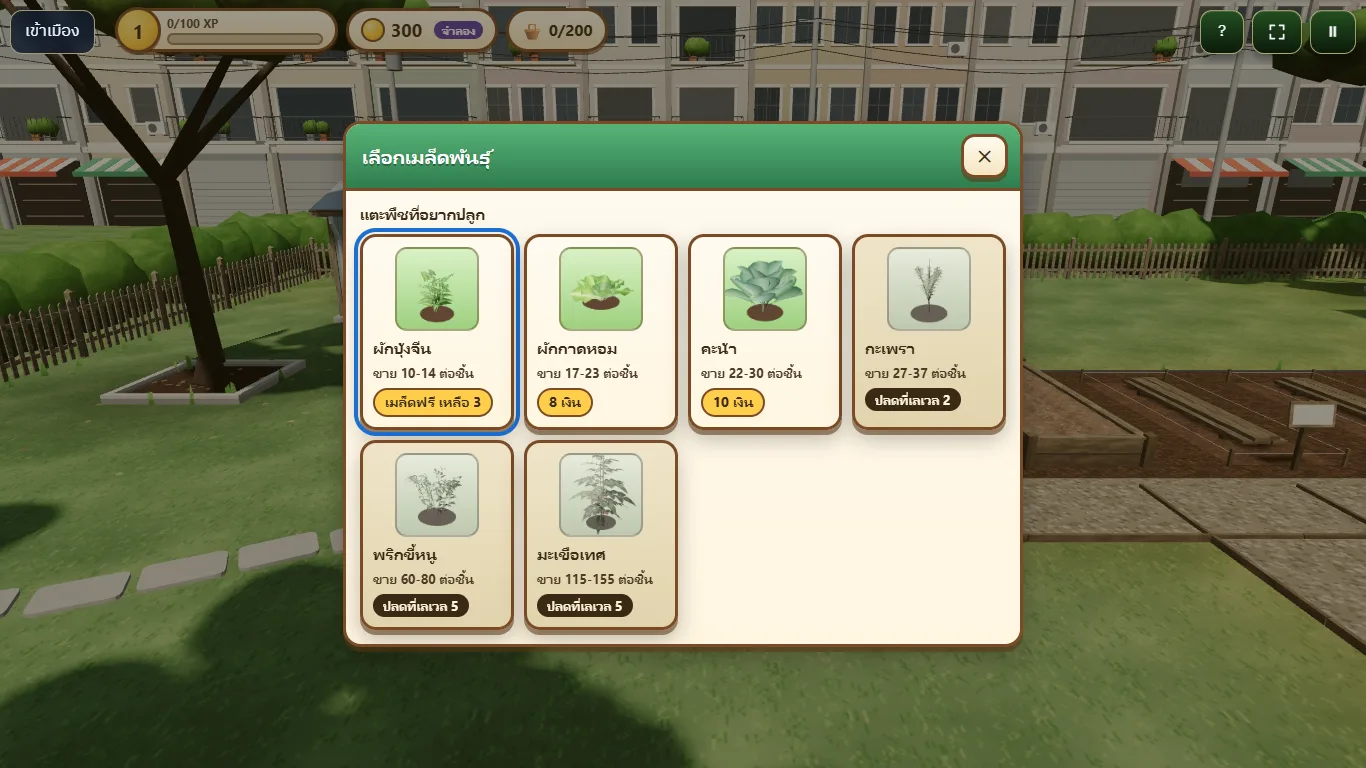
Walk to an empty bed and press A, then choose a seed. Seeds cost farm money, except the first 3 free morning glory seeds. Locked crops show the level that unlocks them. You start with 3 beds.
Water
Press A at a planted bed. Crops grow only while the soil is wet. If the soil dries, the crop stops growing and wilts. It does not die, but its grade drops. Water it again and it grows on.
Wait
Watch the growth bar at the corner of the screen. Each crop takes a different time.
| Crop | Grow time | Unlocks |
|---|---|---|
| Morning glory | 2 min | At start |
| Lettuce | 4 min | At start |
| Chinese kale | 6 min | At start |
| Holy basil | 8 min | Level 2 |
| Chili | 15 min | Level 5 |
| Tomato | 30 min | Level 5 |
- Grow time counts only while the soil is wet.
- Fertiliser (level 3) makes a crop grow 1.5 times faster. It works once per planting.
- The farm keeps growing while you are away for up to 8 hours. When you return, an "While you were away" summary shows which beds are ready or wilted.
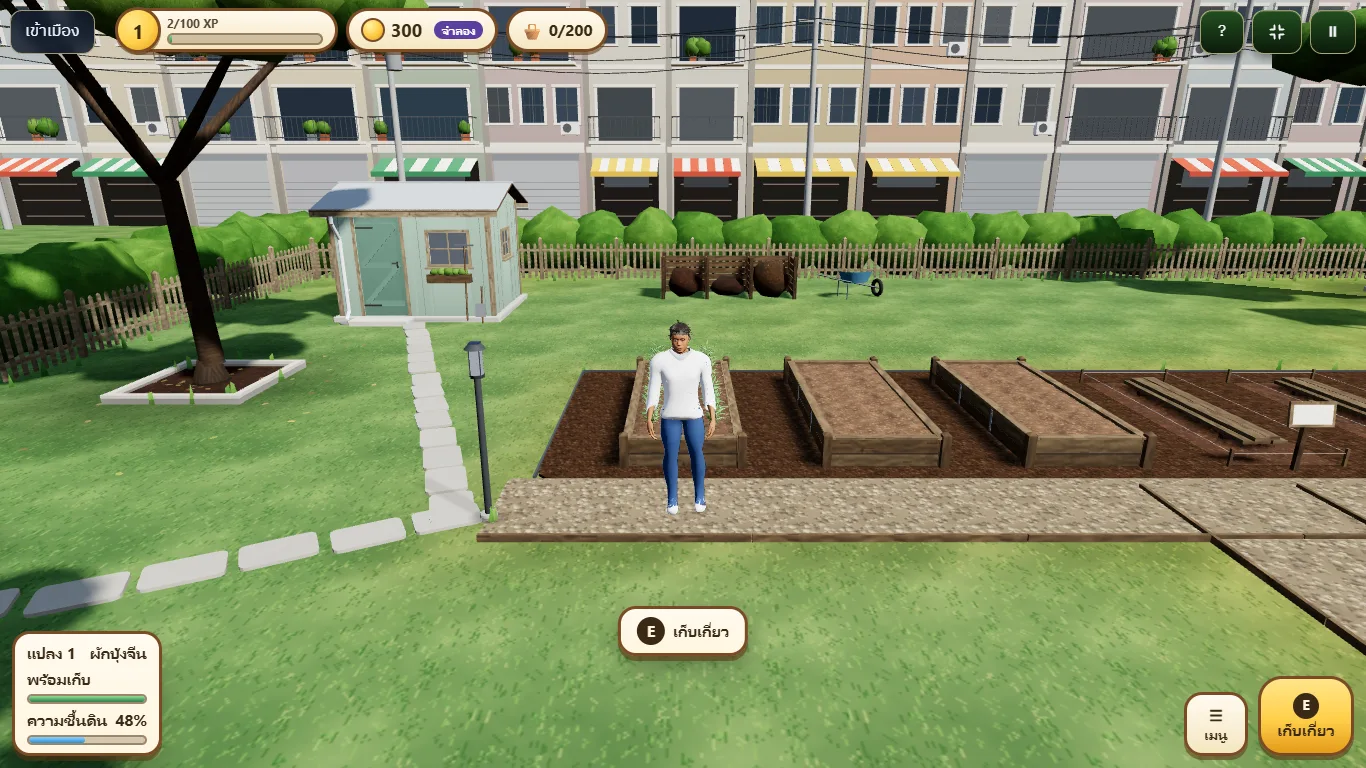
Harvest
When a bed shows Ready!, press A. The produce goes into the crate. Each item gets grade A, B or C depending on how well it was watered, a random size, and sometimes it is a giant (rare). If you leave a ready crop for too long, its grade drops.
Sell
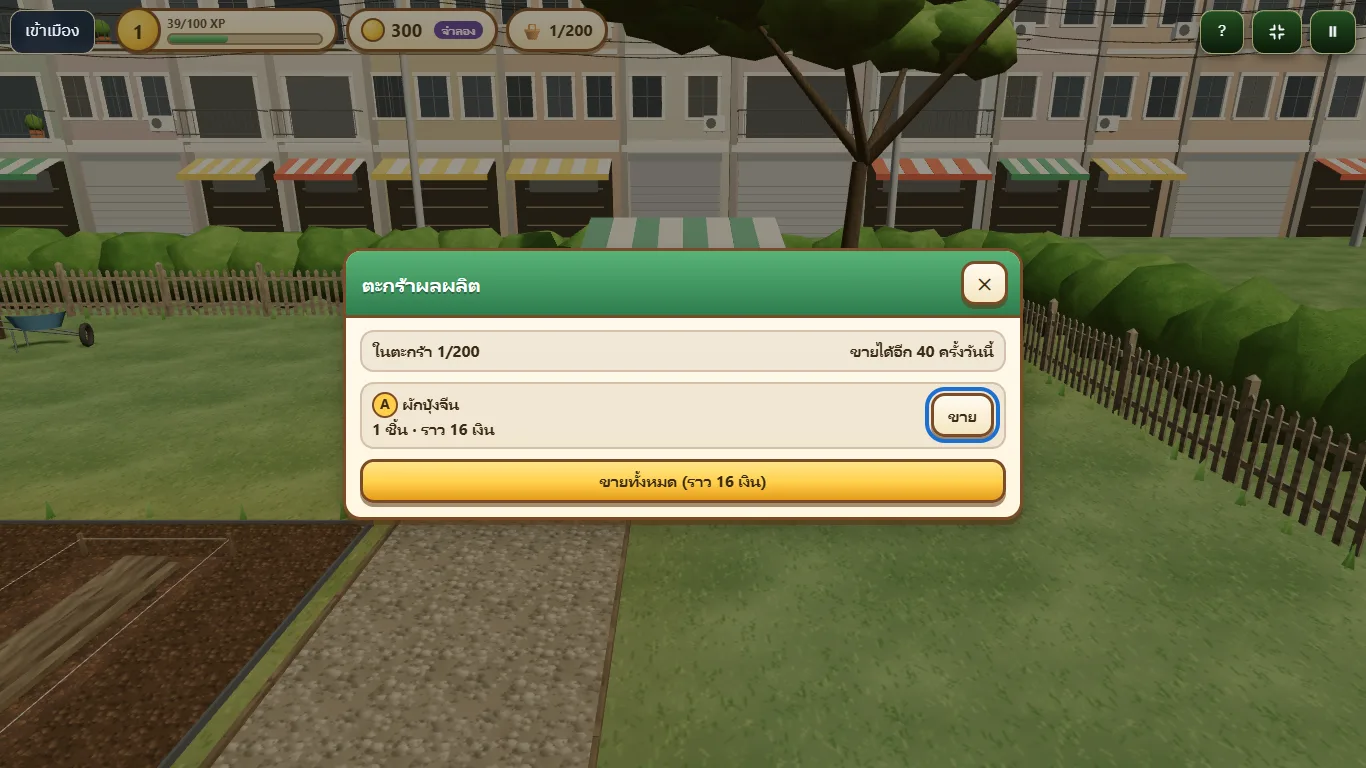
Walk to the sell stand and press A. Choose Sell for one kind, or Sell all. Prices change every day. The price on a seed card is today's real sale range, from grade C to grade A. Grade A pays more, grade C pays less, and a giant pays double. You can sell 40 times a day (resets at midnight Thai time).
5. Farm money
The currency on the farm is called Money. You use it to buy seeds, fertiliser, beds and unlocks.
- This money is for the farm only. It cannot be converted into anything, and it cannot be bought, sold or given to others.
- Farm income is capped at 3,000 Money per day. Under your money on the top bar, Today X / 3,000 shows what you have earned today.
- If a sale would go over the cap, the game sells only the items you are really paid for and keeps the rest in the basket (nothing is thrown away). It tells you first how many items will sell and for how much. Once the cap is reached the sell button asks you to come back tomorrow (the cap resets at midnight Thai time).
6. Levels and unlocks
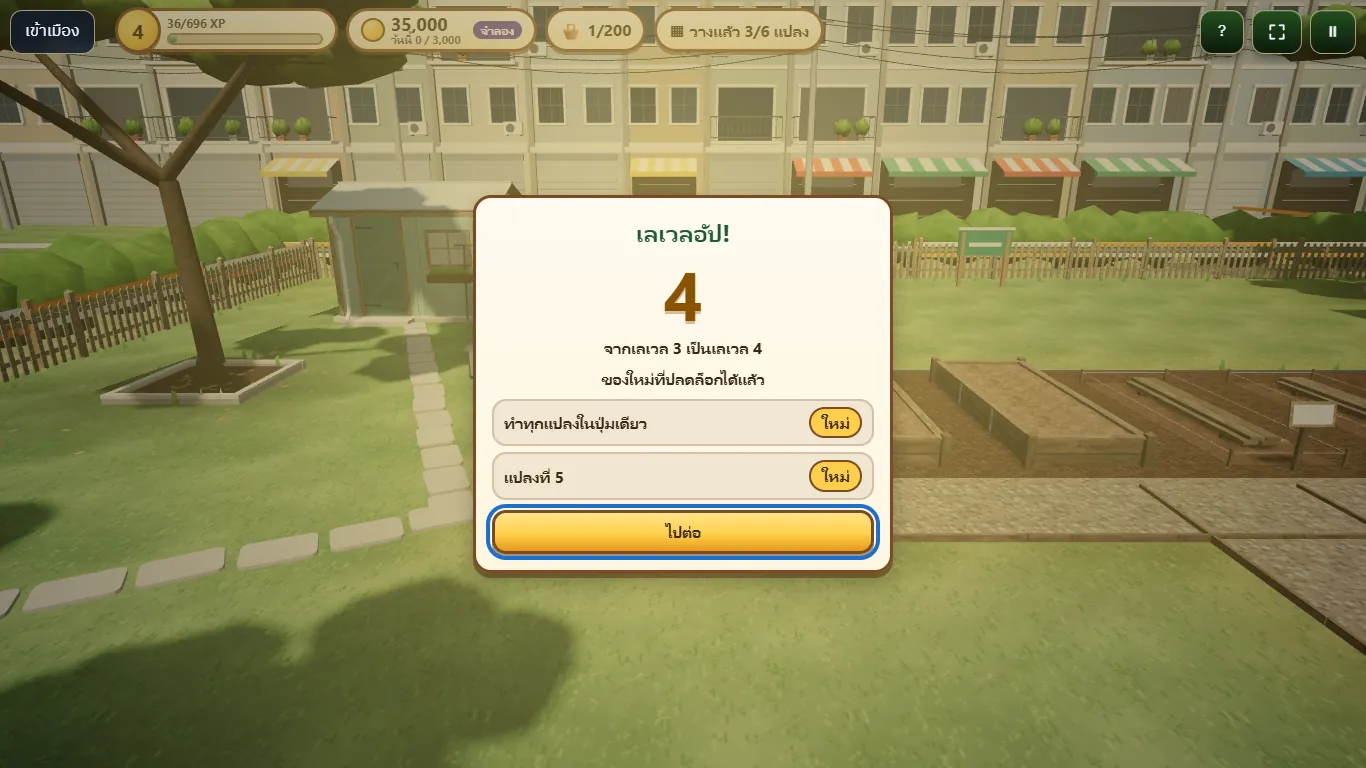
Planting, harvesting, delivering orders, finishing quests and logging a new crop in the almanac give XP. The top level is 10 in this part of the guide (levels 11 to 50 are in section 17). You cannot buy XP. Every unlock needs both the level and enough Money. See them in the Unlocks tile.
| Level | Unlocks |
|---|---|
| 2 | Holy basil |
| 3 | Order board (2 slots), fertiliser, bed 4 |
| 4 | Do-all button, bed 5 |
| 5 | Chili, tomato, bed 6 |
| 6 | Order slot 3 |
| 7 | Scarecrow (decoration) |
| 9 | Flower bed (decoration) |
| 10 | Wooden name sign (decoration) |
Decorations do not increase yield. A level-up shows a celebration and the list of what is new.
7. Daily quests, orders and the almanac
Daily quests
Every day (reset at midnight Thai time) there are 3 quests, such as harvest, water, earn a target amount, plant several kinds, or deliver an order. When one is complete, press Claim reward to get 50 XP and 30 Money. Quests you do not claim before the day ends are lost.
Customer orders
Unlocked at level 3. Customers such as a noodle stall, a canteen or a salad cafe ask for 2–4 items of a crop. Some orders require a minimum grade. Each order expires after 2 hours.
- Walk to the order board (or open it from the menu).
- Press Deliver. The game picks produce from the crate for you, using the lowest grade that qualifies and the smallest items first.
- If the crate does not have enough, nothing is used and the order stays.
You get Money and XP as the reward.
Crop almanac
It records every crop you have harvested. The first harvest of each crop gives 30 XP. Harvesting all 6 crops gives 200 Money once.
8. Day and night
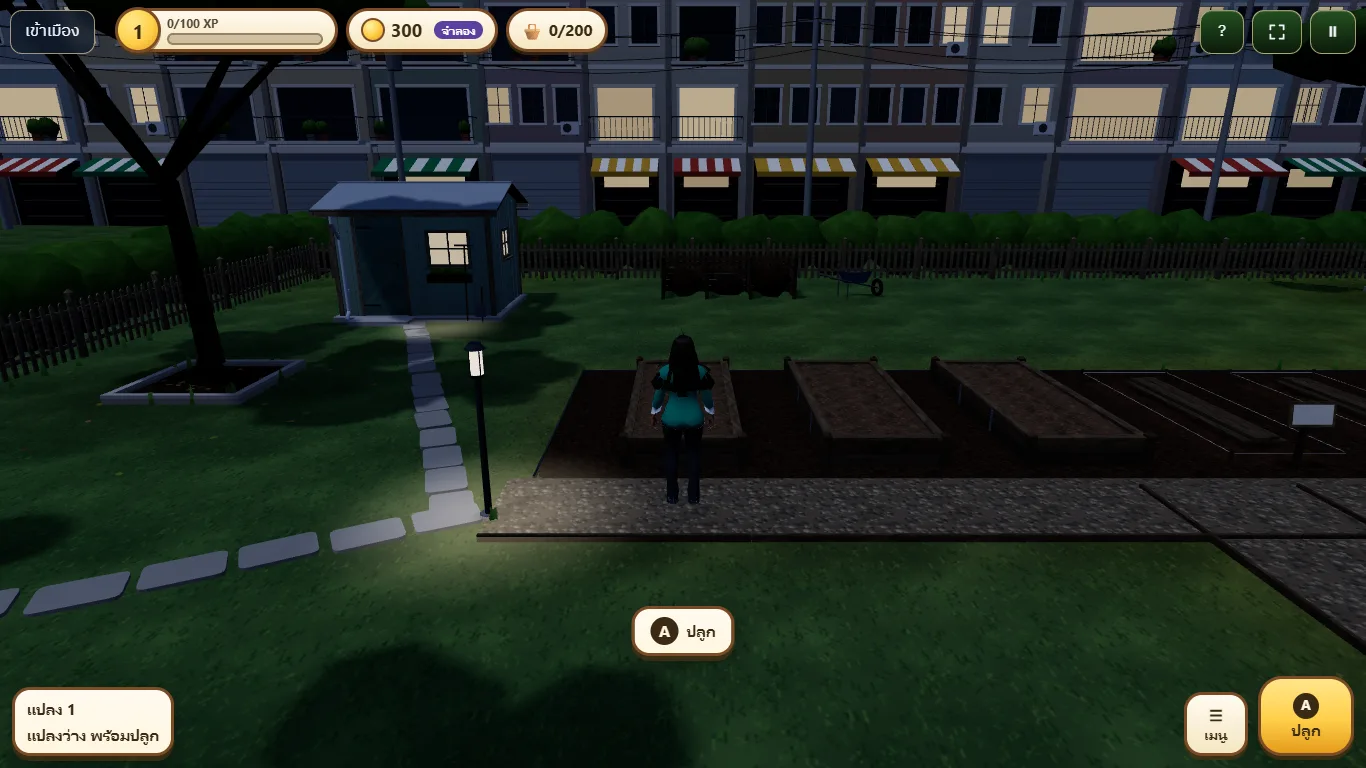
Farm time runs faster than real time: one game day lasts 20 minutes. About 25% of the day is night (full night from 21:00 to 03:00 game time), with a gradual dusk and dawn. Night is only a visual mood and does not affect how crops grow.
9. Stats and leaderboards
- My stats shows your results for the day, week, month, year and all time.
- Leaderboards use the same periods: number of harvests, grade A, biggest item and level.
- Only results the server has verified count, and only for members. Guests are not ranked.
- You can hide your name on the boards from the stats page.
10. Guests and members
You can play right away without signing up (guest), but guests see no stats and are not ranked. To keep your farm, press Sign in to keep this farm and then Move to my account. Your level, XP, almanac and the crate contents move over, but beds still growing in the guest farm are not moved (you are warned first).
11. Offline
If your connection drops, a banner says "You are offline. Actions are paused until the connection returns." The buttons stop working until it returns. You do not need to refresh.
12. Farm zones
Your farm grows beyond the first rooftop. Each new area is called a zone. Open the Zones tile in the menu to see them all. Every zone has a card that shows what you need to unlock it.
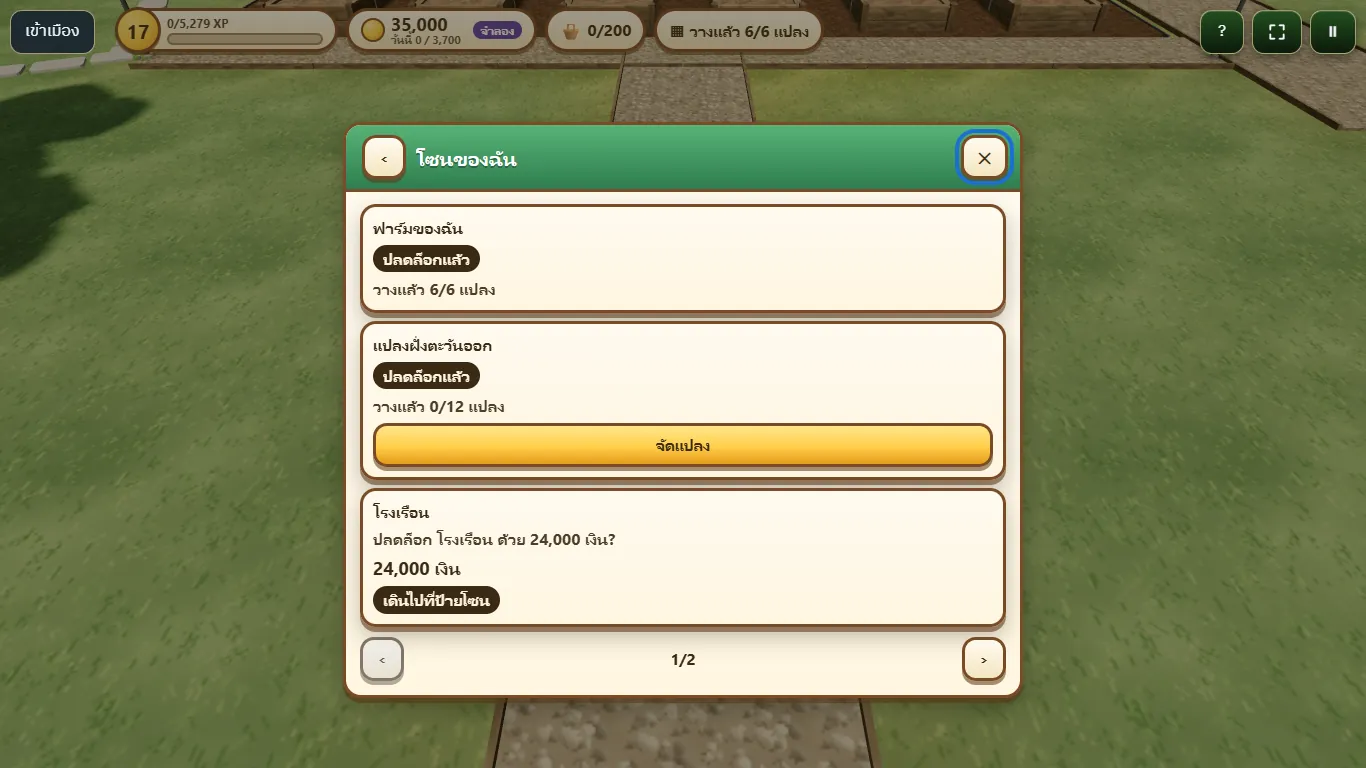
| Zone | Level | Cost | What it is for |
|---|---|---|---|
| My farm (the rooftop where you start) | 1 | Free | Your first 6 beds. They are fixed and cannot be moved |
| East plots | 6 | 6,000 money | Up to 12 beds you place yourself |
| Greenhouse | 16 | 24,000 money | Up to 8 beds where the soil stays wet longer (section 14) |
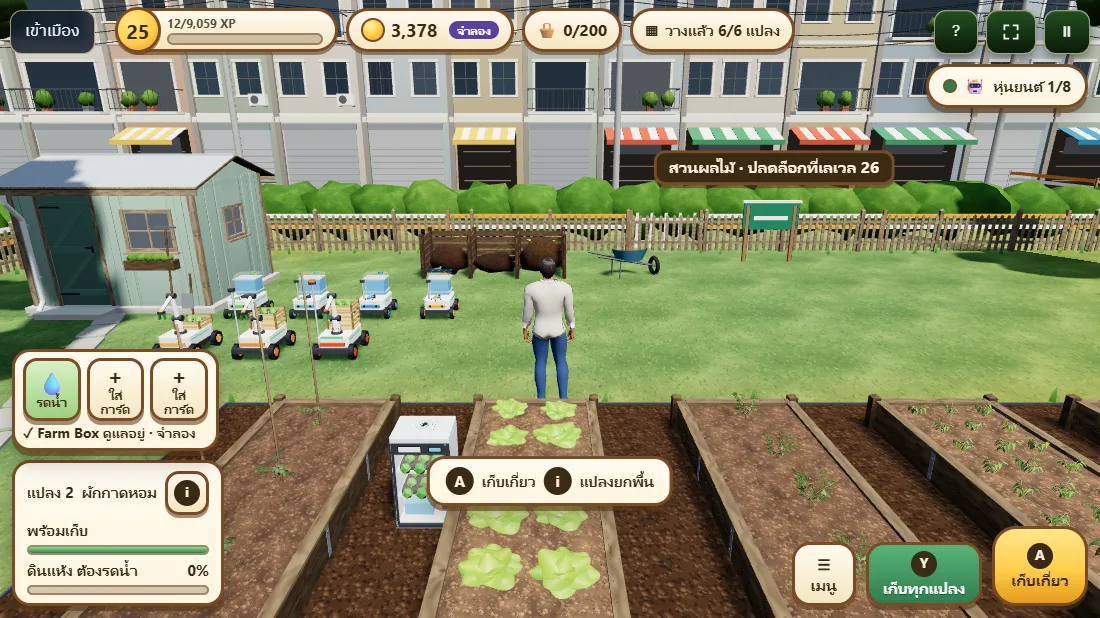
| Orchard | 26 | 90,000 money | Up to 40 spots for fruit trees (section 15) |
| Big field | 36 | 240,000 money | Open now. Up to 16 rows for corn, pumpkin and sunflower. You need the east plots first |
| Fish pond | – | – | A future idea. It is only a "Coming soon" card |
- To unlock a zone you need both the level and enough money. A card that is not ready shows a lock and what is missing. It has no button, so tapping it only tells you the reason.
- Walk to the zone's sign to unlock it. If you are too far away, the card tells you to walk to the sign.
- Once you unlock a zone, its temporary fence disappears and the gate between the zones opens. A gate opens only when the zones on both sides are yours.
- The number of beds you may place in a zone grows with your level (table in section 17). A card shows "placed / allowed" and the level that adds more.
13. Placing your own beds
In the east plots, the greenhouse and the orchard you choose where each bed goes. This is called build mode.
Open build mode
- Walk into a zone you own.
- Press the Arrange beds button on the zone card, or the button shown at the zone sign, or press G on the keyboard.
- Four buttons replace the usual ones: Place, Rotate, Move / Remove and Done. You can still walk around. The first time, a short hint card appears. Close it and it will not show again.
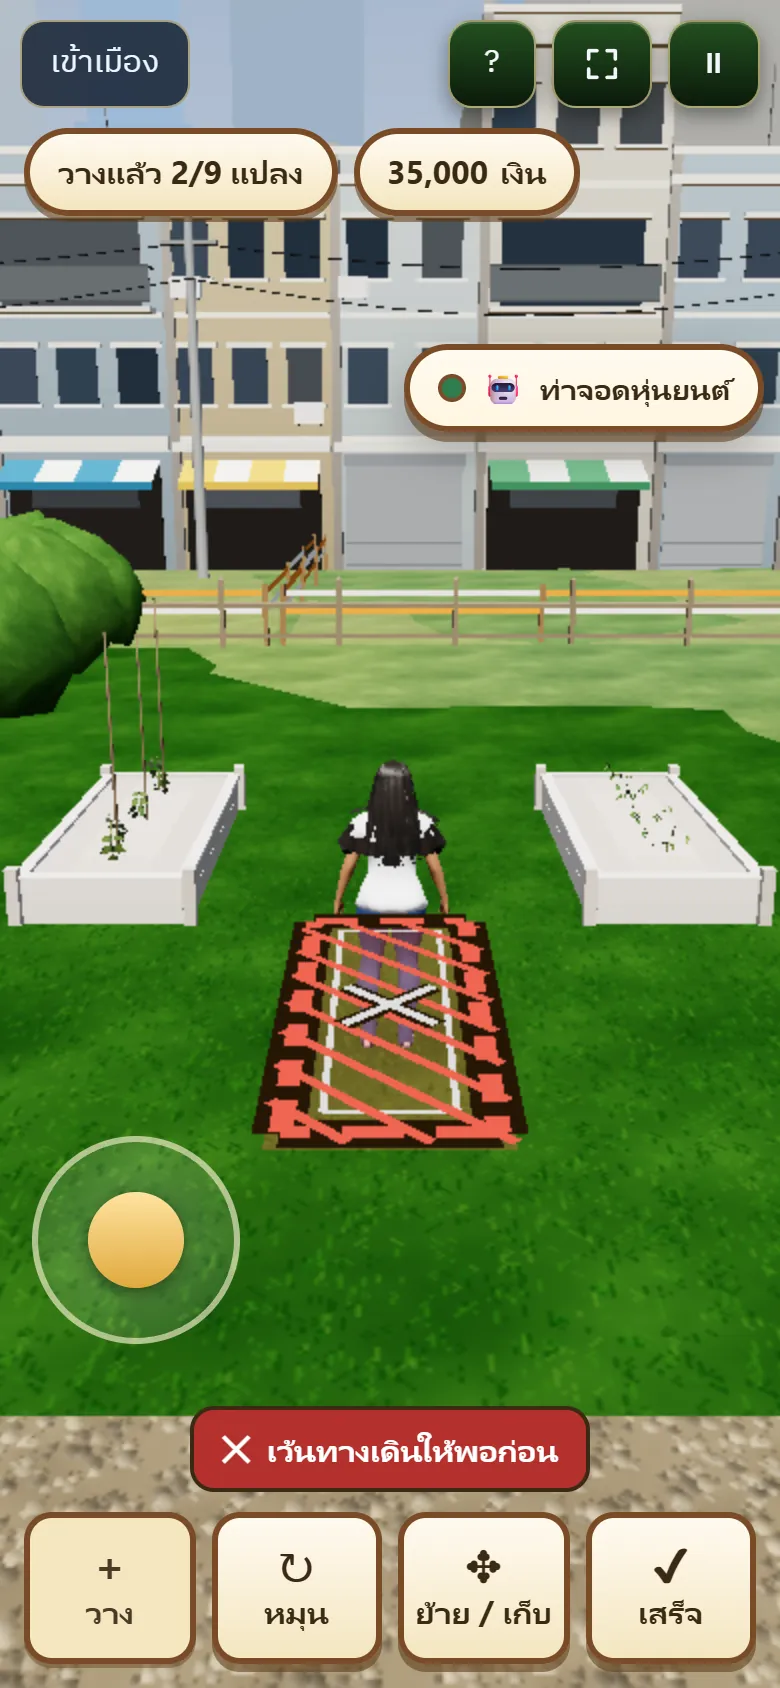
A coloured outline on the ground shows where the bed would go. The outline is exactly the size of the real bed.
- Green with a tick: you can place it here.
- Red with a cross and stripes: you cannot. A short sentence above the outline says why and what to do, for example "Leave a wider path" or "Too far, walk a little closer". The outline can still be moved while it is red.
Controls
| Action | Keyboard | Phone | Gamepad |
|---|---|---|---|
| Place the bed | Enter / Space | Place button | A |
| Rotate 90 degrees | R | Rotate button | X |
| Pick up a bed to move it, or remove it | M / Delete | Tap an empty bed, then choose Move or Remove | Y to move, hold Y to remove |
| Nudge the outline by half a metre | Arrow keys | Drag the outline | D-pad |
| Leave build mode | Esc | Done button | B |
- The outline starts about 2.5 metres in front of your character.
- On a phone, tap the ground to put the outline there, drag the outline to slide it, and drag anywhere else to turn the camera as usual.
- The Place button is switched off while the outline is red, while the game is sending your request, and while you are offline.
Pay and confirm
When you place a new bed, a small window shows the price and your money. Press Confirm to place it, or Cancel. The window opens on Cancel, so pressing Enter by mistake costs nothing.
- The first bed in a zone is cheap and each further bed costs a little more. East plots beds start at 300 money, greenhouse beds at 800 and orchard spots at 600.
- If you have a free bed in your stock, the window says "Use a bed from stock" and costs nothing.
- If you lack money, the window shows how much is missing and Confirm stays off.
- Nothing changes until the server answers. If it says no (for example another bed was placed there a moment ago), you see a message and the outline turns red.
Rules for a good spot
- A bed must fit fully inside the zone's building area, away from paths, gates, signs and doors.
- Keep a path about one metre wide between beds. Beds cannot touch each other.
- You must stand within about 8 metres of the spot.
- Each zone has a limit that grows with your level, and the whole farm has a limit of 100 beds.
Move or remove a bed
- Only an empty bed can be moved or removed. If a plant is growing, harvest it or clear it first. The menu tells you so.
- Removing puts the bed back in your stock. You get no money back, and placing a bed from stock is free.
- Moving costs nothing, but you can move only about 20 beds per hour.
- Clearing a bed (from the bed's own panel, not build mode) throws away its plant. The game asks you twice before it does.
14. The greenhouse
Unlock the greenhouse at level 16 (24,000 money). It is a building with a door on its east side, reached through the gate on the west of the rooftop.
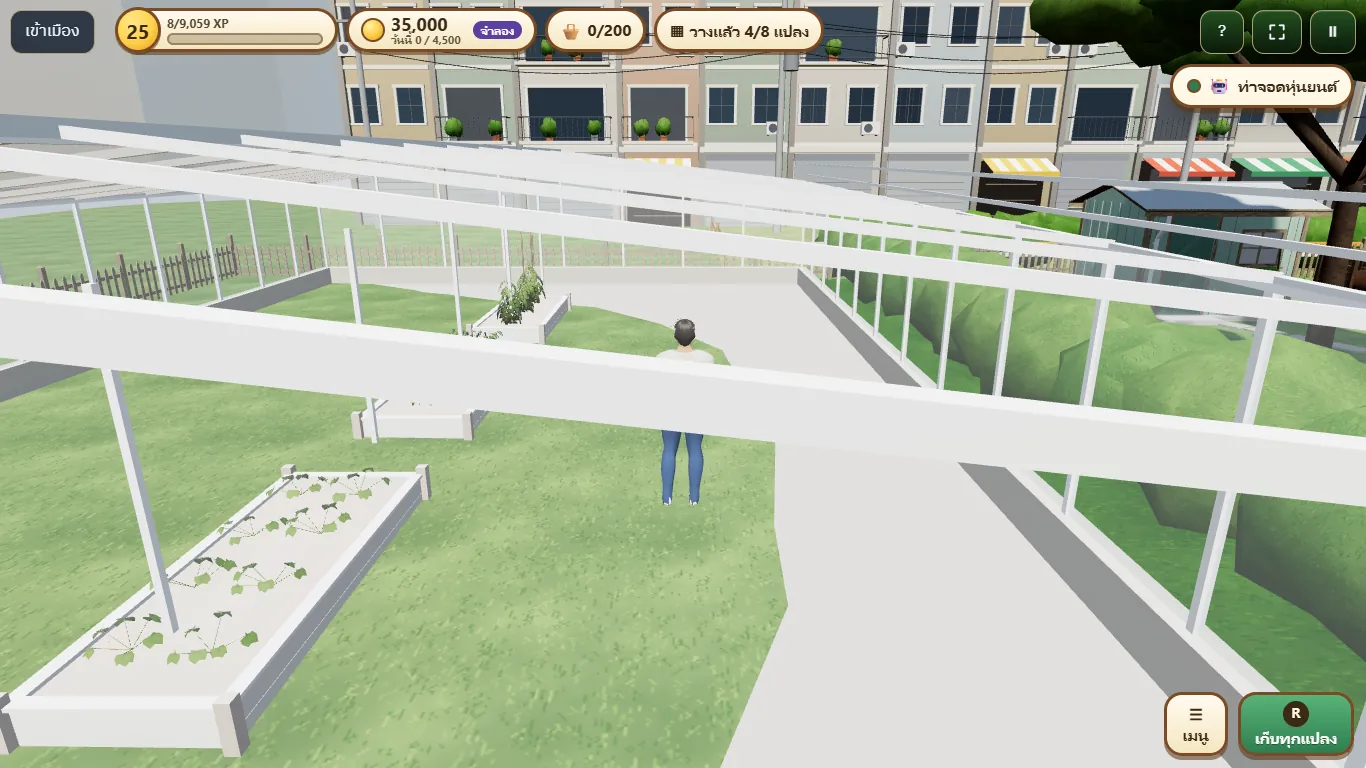
- Beds inside are indoor beds. They look like the rooftop beds, but the soil stays wet twice as long, so you water less often and crops spend less time waiting for water.
- Some crops grow only in the greenhouse: strawberry (level 17) and melon (level 20). Their seed cards say which bed they need.
- The usual crops, such as herbs and fruiting vegetables, also grow in indoor beds.
- Tree beds cannot be placed in the greenhouse, and indoor beds cannot be placed outside it.
- You can place up to 8 beds. You may place 2 at level 16, then more as you level up (section 17).
15. Fruit trees and the orchard
Unlock the orchard at level 26 (90,000 money). It is a large garden north of the rooftop, through the gate at the top of the rooftop path.
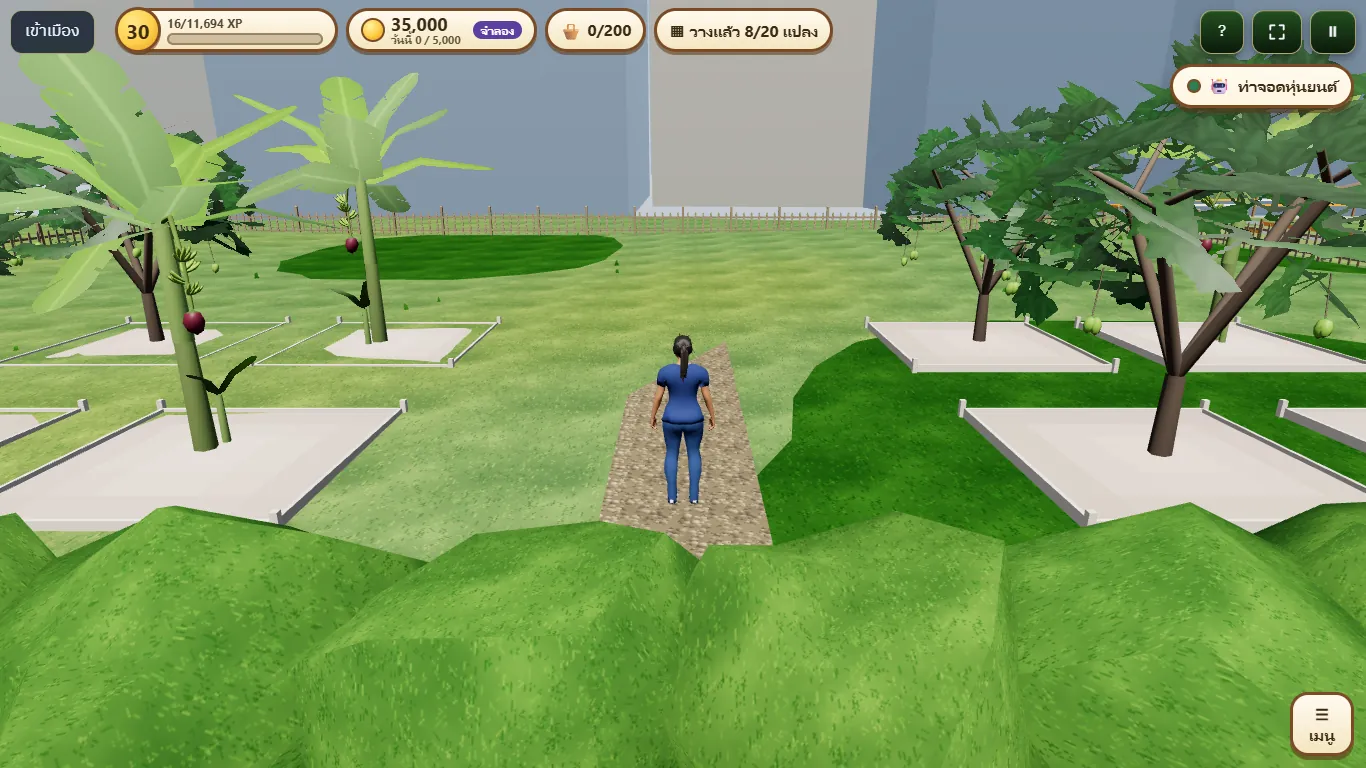
- Each tree has its own wide tree bed, much bigger than a vegetable bed. You place them with the same build mode as above.
- A fruit tree is bought as a young tree and planted once. It costs more than ordinary seeds.
- A tree grows through stages: sapling, young tree, tree, flowering, fruiting and ready.
- After you harvest, the tree does not die and does not need replanting. It goes back to the middle of its growth and bears fruit again in much less time than the first time. A mango, for example, fruits again in about 20 minutes.
- Each harvest gives one fruit basket. Size, grade, giants and daily prices work as for vegetables.
| Fruit | Level | Unlock cost | Young tree |
|---|---|---|---|
| Mango | 26 | 5,000 money | 400 money |
| Banana | 29 | 6,000 money | 300 money |
| Durian | 33 | 15,000 money | 1,500 money |
If you clear a tree you do not get its price back, so think before you clear.
16. New crops
New crops unlock by level. Each one needs its unlock cost in money once, then seeds each time you plant.
| Crop | Level | Unlock cost | Grows in |
|---|---|---|---|
| Coriander | 11 | 800 | My farm, east plots, greenhouse |
| Cucumber | 13 | 1,200 | My farm, east plots, greenhouse |
| Spring onion | 14 | 1,000 | My farm, east plots, greenhouse |
| Strawberry | 17 | 3,000 | Greenhouse only |
| Melon | 20 | 5,000 | Greenhouse only |
| Lemongrass | 21 | 2,500 | My farm, east plots, greenhouse |
| Mango | 26 | 5,000 | Orchard |
| Banana | 29 | 6,000 | Orchard |
| Durian | 33 | 15,000 | Orchard |
Corn, pumpkin and sunflower belong to the big field (levels 36, 40 and 45). The big field is open, so you can unlock it and grow them once you reach those levels.
Almanac book 2 holds only the new crops (not the 6 crops of book 1) that you can grow in the zones open right now: 12 crops today, including the 3 of the big field. Harvesting all of them pays 1,000 money once, you do not need to finish book 1 first, and it is never paid again when more crops are added later.
17. Levels 1 to 50
The top level is now 50. The first 10 levels are the same as before (section 6). Levels 11 to 50 add the following. You still need both the level and the money.
| Level | New |
|---|---|
| 11 | Coriander, east plots 8 beds |
| 12 | East plots 9 beds |
| 13 | Cucumber, east plots 10 beds |
| 14 | Spring onion, east plots 11 beds |
| 15 | East plots 12 beds (full) |
| 16 | Greenhouse, 2 beds |
| 17 | Strawberry |
| 18 | Greenhouse 3 beds |
| 19 | Greenhouse 4 beds |
| 20 | Melon, greenhouse 5 beds |
| 21 | Lemongrass |
| 22 | Greenhouse 6 beds |
| 23 | Order slot 4 (2,000 money) |
| 24 to 25 | Greenhouse 7 and 8 beds (full) |
| 26 | Orchard, 4 trees. Mango |
| 27 to 28 | Orchard 8 and 12 trees |
| 29 | Banana, orchard 16 trees |
| 30 to 32 | Orchard 20, 24 and 28 trees |
| 33 | Durian, orchard 32 trees |
| 34 to 35 | Orchard 36 and 40 trees (full) |
| 36 | Big field, corn, "Fish pond" card |
| 40 | Pumpkin, "Export" card |
| 45 | Sunflower, another "Coming soon" card |
| 50 | Title Future Farmer, shown on your name and on the boards. You get it automatically |
Levels 36 to 50 add rows to the big field and its crops.
FAQ
Can farm Money be exchanged for anything? No. It is for the farm only.
Does a wilted crop die? No. It stops growing and its grade drops. Water it again and it grows on.
Why does it say I am too far? The server checks that your character is really near that spot. Step a little closer and try again.
What if the crate is full? The crate holds 200 items. Sell at the stand or deliver orders first.
I cannot sell any more? You can sell 40 times a day, and farm income is capped at 3,000 Money a day. Come back tomorrow.
A button does not respond? If you press too fast, wait a moment, or check whether you are offline.
This section is shown only when the farm robot system is switched on · Updated 6 Nov 2026 · The server decides every result
1. What robots do
Robots in the game are machines, not characters. You buy them with farm money at the Robot Dock and send them to work in zones you have unlocked. They do the repetitive jobs; you can still play everything yourself.
| Machine | What it does | Looks after | Available at level (price, farm money) |
|---|---|---|---|
| Watering robot | Waters when the soil is dry | 6 beds each | #1 Lv5 (1,500) · #2 Lv11 (3,000) · #3 Lv15 (5,000) · #4 Lv21 (8,000) |
| Farm Box S (simulated) | Waters before the soil dries | 4 beds | Lv8 (3,000), one only |
| Care cards | Unlocks the harvest, replant and fertilise cards | – | Lv10 (1,000), bought once |
| Harvest robot | Harvests, replants, fertilises | 6 beds each | #1 Lv12 (5,000) · #2 Lv17 (8,000) · #3 Lv24 (12,000) |
- Buy in order. The next one needs the level and enough money; if not, the button tells you the level or how much is missing.
- Harvest robots need the care cards first.
- Purchases cannot be sold back and are not refunded.
2. The Robot Dock: buy and send to work
Walk to the Robot Dock beside the shed on the rooftop and press the button that appears (if you are too far, the game tells you to step closer).
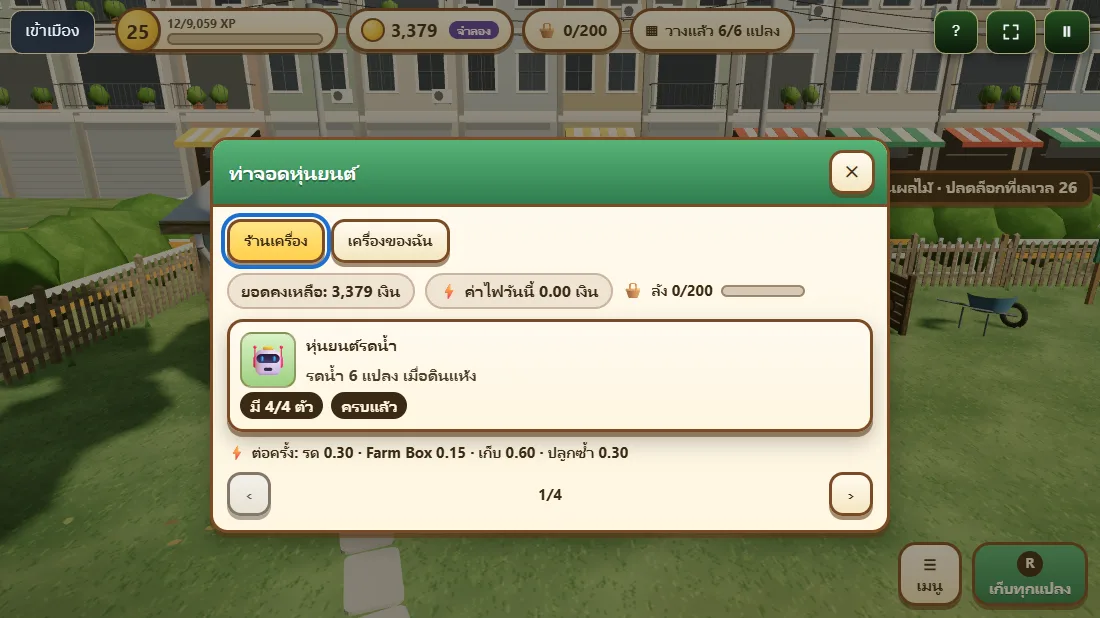
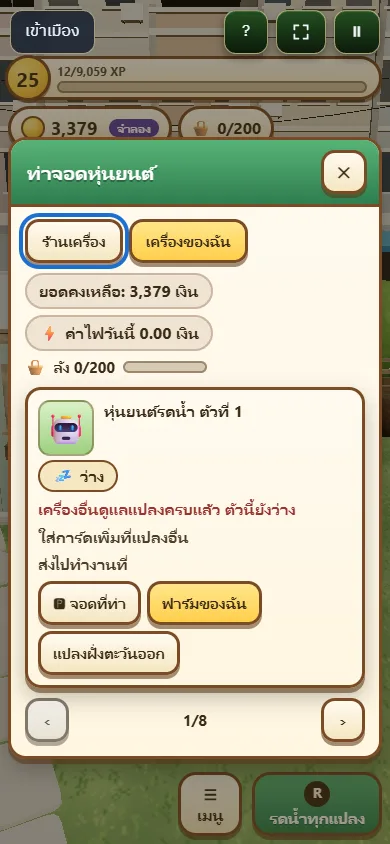
- The Machine shop tab is for buying. It shows your money, today's power cost and the crate fill.
- The My machines tab is for orders. A machine you have not sent anywhere is parked at the dock and does no work.
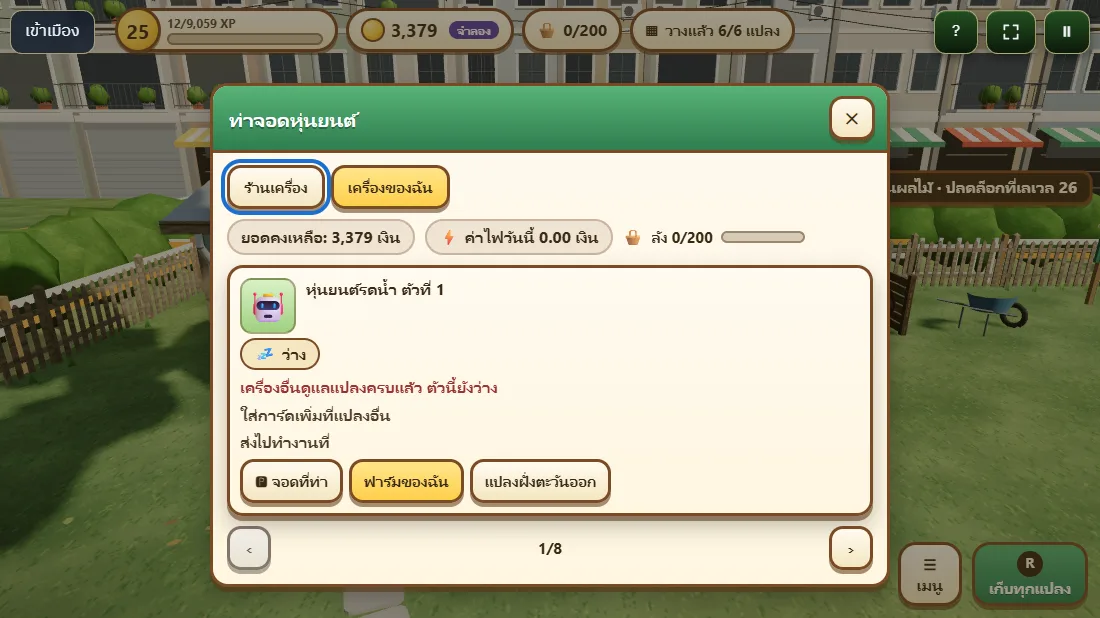
- Open My machines.
- On the robot you want, pick a zone under "Send to work at" (for example My farm or the East beds).
- Read the status: Working · Idle (other machines already cover the beds) · Stopped (a reason and a fix are shown under the name) · Parked at the dock.
- Change the zone or call it back to the dock at any time, free of charge.
On a phone the same window is stacked vertically.
The small Robots 2/4 badge at the top right shows how many robots are working out of all you own (red when one has stopped). Tap it to open the dock.
3. Care cards: tell the robot what each bed needs
Robots only look after beds that have cards. Open a bed's panel and pick up to 3 care cards per bed.
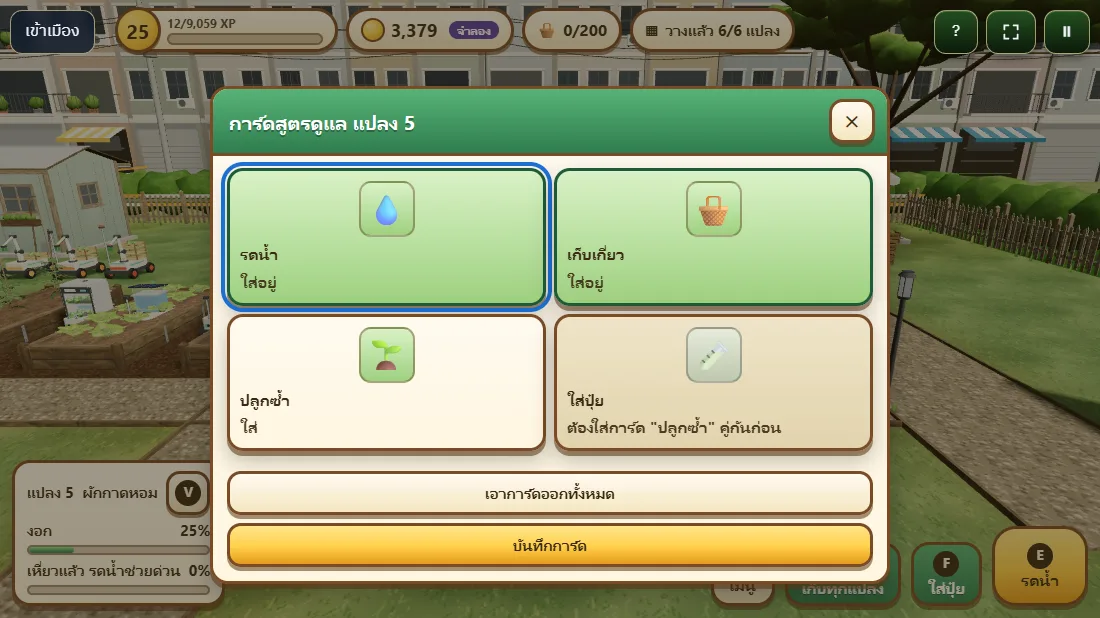
| Card | Needs | Notes |
|---|---|---|
| Water | At least 1 watering robot or Farm Box S | Available from level 5, no care cards purchase needed |
| Harvest | A harvest robot + the care cards | Puts ripe crops into the crate |
| Replant | The Harvest card on the same bed | Plants the same crop again after harvesting; not for tree beds (trees regrow by themselves) |
| Fertilise | The Replant card on the same bed, and the fertiliser unlocked | Fertilises when the robot replants |
- If a card cannot be used yet, its slot says why, for example "You need a robot that does this card first" or "Add the Harvest card first".
- Press Save cards to confirm, or Remove all cards to return the bed to manual play.
- Three cards is the limit; remove one to add another. Water + Harvest + Replant fills the three slots. Harvest + Replant + Fertilise also fills them, so that bed has no Water card and you water it yourself.
- A bed with cards but not enough machines is not an error. The panel says Not enough robots; buy another or send one to this zone.
How many beds one machine covers
A watering robot covers 6 beds, a Farm Box S 4 beds, a harvest robot 6 beds. Beds with a Water card are served in bed-number order, Farm Box first, then watering robots. Beds beyond capacity show "Not enough robots". Only machines sent to that zone count.
4. Farm Box S (simulated)
The Farm Box S in the game is a simulation. Everywhere its name appears there is a Simulated badge. What it does in the game (covers 4 beds, waters before the soil dries) is a game rule, not product information.
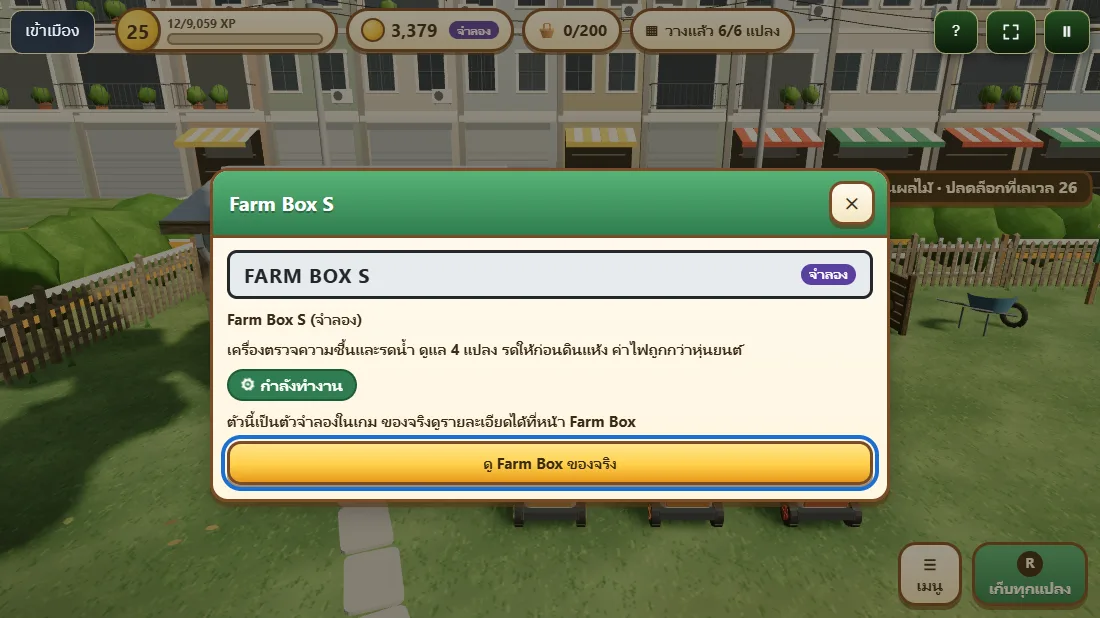
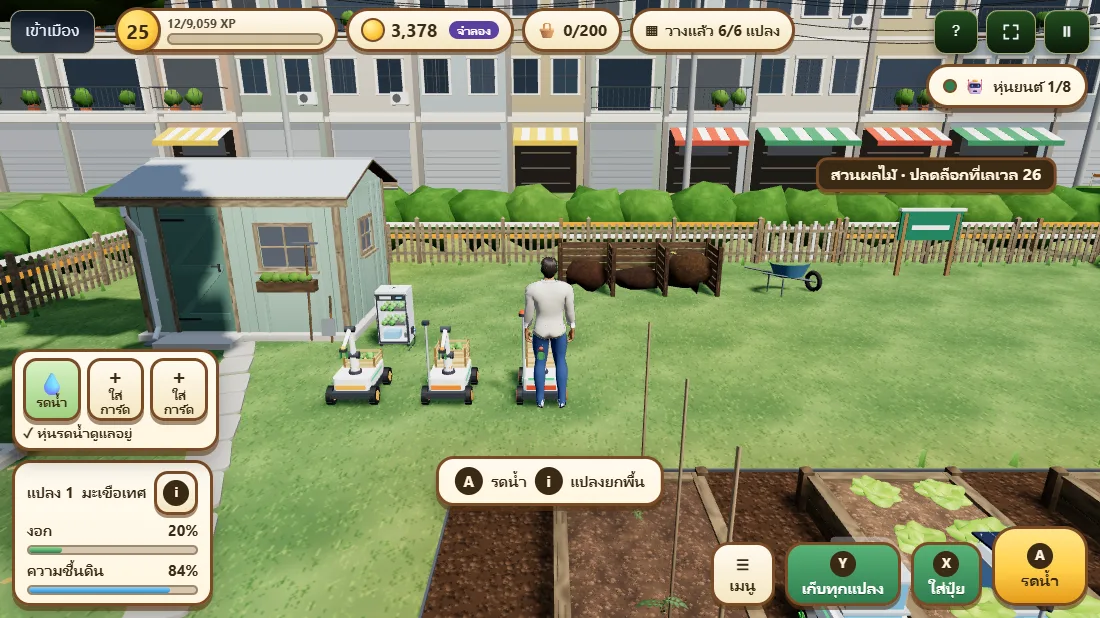
- It waters before the soil dries, so crops do not wilt, usually grade A, and each action costs less power than a robot.
- The detail window has one See the real Farm Box button, which opens an in-game window with the real product information (no real prices are shown in the game).
5. Power cost
Every action a machine does costs power, paid in farm money and deducted automatically. It is in-game money only, not credits.
| Action | Power per action (money) |
|---|---|
| Watering robot waters | 0.30 |
| Farm Box waters | 0.15 |
| Harvest robot harvests | 0.60 |
| Replant | 0.30 |
- Replanting also pays the crop's normal seed price (free seeds are not used) and fertilising pays the normal fertiliser price, with no extra power.
- The dock shows today's power cost. If money runs out, the robot stops that job rather than going negative; your balance never goes below zero.
- Power and seeds are spending, not income, and machines do not earn money. Income comes only from what you do yourself: selling, orders, quests and the almanac.
- The daily income cap is 3,000 money up to level 10, then rises by 100 per level, up to 7,000.
6. The crate
Harvest robots put produce in the same crate you use. It holds 200 items. The Crate 46/200 meter is in the dock panel and warns you when it is nearly full. When full, harvest robots stop until there is room.
Sell at the market stall as usual; robots do not sell for you. Grade depends on how long a crop wilted while growing. A watering robot waters about a minute after the soil dries, so crops wilt slightly and more often end up grade B; the Farm Box helps you get grade A.
7. How much XP
A robot harvest gives 50% of the XP you would get harvesting yourself (rounded down). The produce counts for the crate, stats and the "harvests" leaderboard as usual, but daily quests and orders do not count robot work. A new crop a robot harvests for the first time is added to the almanac with the usual almanac XP.
8. While you were away
Robots keep working while you are out of the game for up to 8 hours. When you return, a While you were away window summarises how long the farm looked after itself, how many waterings, how many items harvested, beds replanted, XP earned and power paid.
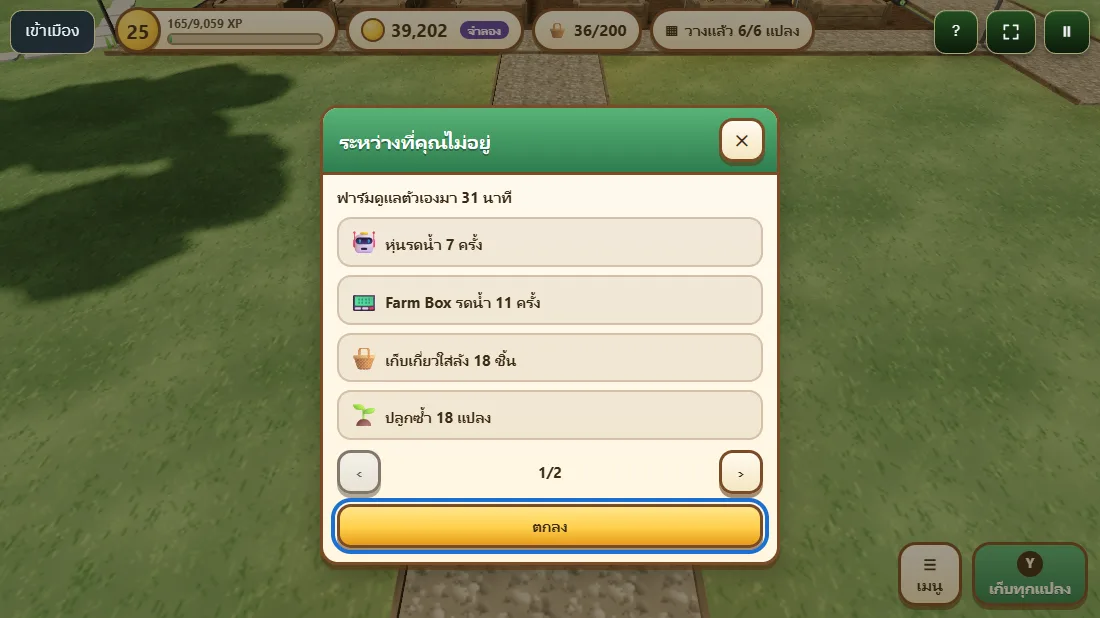
- Stopped machines are listed in the summary; press See robots to fix them.
- "Planted without fertiliser (not enough money)" means the robot replanted but could not afford fertiliser; it cannot be added later.
- After 8 hours the farm and the robots stop together, so you never get more than you should.
- The screenshots in this guide use sample data from a preview page, not real player data.
9. A robot has stopped: how to fix it
| Message | Meaning | Fix |
|---|---|---|
| Out of money, cannot pay the power | Not enough money for the next job | Sell produce at the stall |
| Crate full | The crate holds 200 items | Sell produce at the stall |
| No crop to replant | The set crop cannot be planted (not unlocked, or not a crop of that zone) | Change the card or unlock the crop |
| Parked at the dock | Not sent to work yet | Pick a zone under "Send to work at" |
| This zone is not open yet | Sent to a zone you have not unlocked | Pick an open zone |
| No beds in this zone with this machine's card | Nothing to look after | Add cards to beds or send it to another zone |
| Other machines already cover the beds | This one is spare | Add cards to other beds |
FAQ
Do robots sell crops for me? No. Sell them yourself at the stall.
Do robots make me more money? No. Power and seeds are spending; robots only save you time.
Does buying Farm Box S in the game give me the real product? No. It is an in-game simulation bought with farm money only.
Can I sell a robot back? Not at the moment.
Why did the robot replant without fertiliser? The Fertilise card is paired with Replant and needs enough money for fertiliser when the robot plants. If there is not enough, it plants without fertiliser and says so in the summary.
This part shows only once fish and energy are switched on in the farm · Updated 8 Nov 2026 · The server decides every result
1. Tilapia tanks
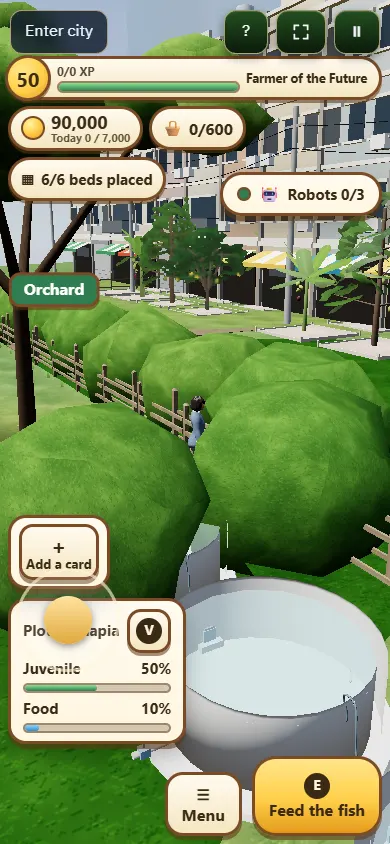
A round cement tank is 2 × 2 m and goes in the east beds with bed arrangement mode (press T, or RB on a gamepad, to switch from a raised bed to a fish tank). Tanks have their own slots and do not use vegetable bed slots.
| Tank | Unlocks at level | Slot price (farm money) |
|---|---|---|
| 1 | 15 | 2,000 |
| 2 | 19 | 2,500 |
| 3 | 25 | 3,125 |
| 4 | 30 | 3,906 |
- Walk to a tank and press Stock fry: 40 tilapia fry for 150 money (level 15 and up)
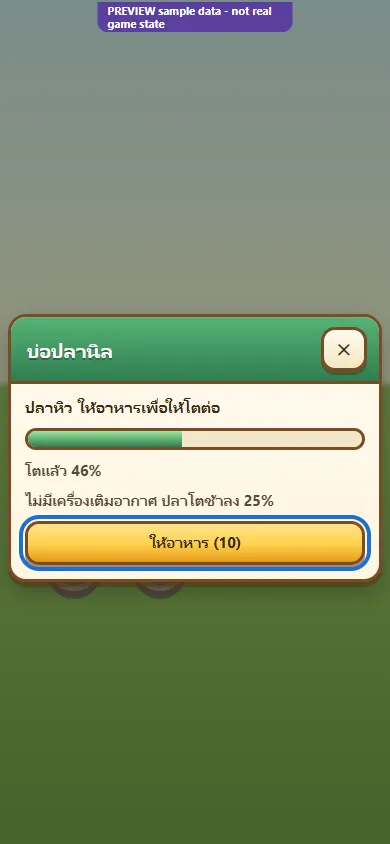
- The fish get hungry when the food runs out (about 20 minutes). Press Feed the fish, 10 money a meal. Hungry fish stop growing but never die
- With an aerator they are fully grown in 90 minutes (25% slower without one). Press Catch fish to put one batch in the crate, then sell it at the stand at today's price and its grade
- Feeding every time gives grade A; leaving them hungry for long lowers the grade
- Aerator: bought at the robot dock, level 15, 2,500. It counts for batches stocked after you buy it and uses a little power every game day
- "Feed when hungry" card: put it on a tank and the watering robot of that zone feeds the fish (food 10 + power). Robots never catch fish; you do
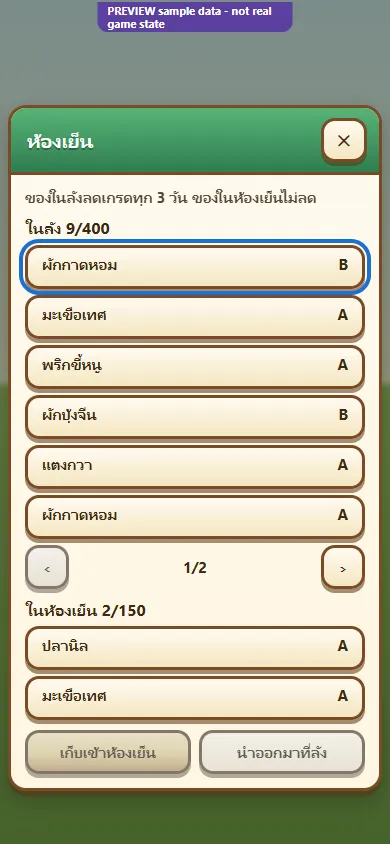
2. Warehouse, cold room and freshness
| Item | Level (price) | Effect |
|---|---|---|
| Warehouse 1 | 12 (4,000) | crate holds 400 |
| Warehouse 2 | 20 (10,000) | crate holds 600 |
| Cold room 1 | 22 (12,000) | 150 places |
| Cold room 2 | 28 (8,000) | 300 places |
- Produce harvested after this system opens drops one grade every 3 real days in the crate, down to grade C; it never disappears. Older produce does not drop
- The cold room keeps the grade. Walk to its door and choose what to put in or take out. Moving in and out never makes produce fresh again (only time outside counts)
- Sell all leaves the cold room alone; you can still sell its items one by one, for example on a good price day
3. Solar panels and batteries
| Item | Level (price) |
|---|---|
| Solar panels 1–2 | 18 (1,200 each) |
| Panels 3–4 | 22 |
| Panels 5–6 | 27 |
| Panels 7–8 | 32 |
| Batteries 1–2 | 20 (2,500 each) |
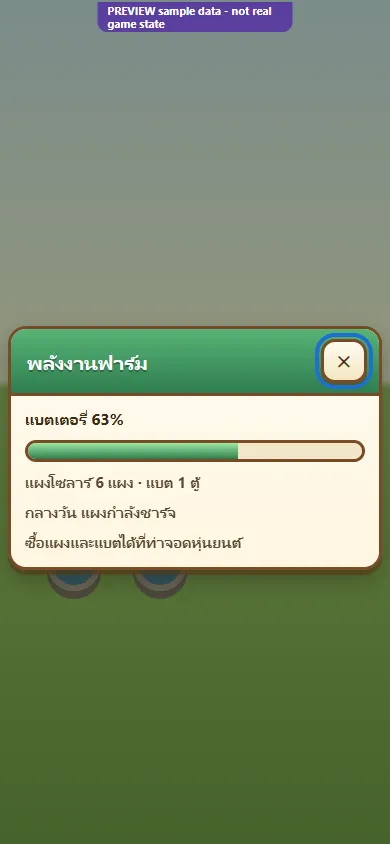
- Panels make power only in game daytime (06:00–18:00) and store it in the battery. Robots use the battery first and buy the rest from the grid, so the power bill drops
- Each panel stores a little power by itself even without a battery
- See the battery in % at the battery cabinet next to the panels (walk close and press Energy)
Everything is bought with farm money, not credits, and cannot be sold back.